Creating a Rain Cloud in a Jar is a captivating science experiment that brings the mysteries of weather right into your kitchen or classroom. By harnessing the principles of water vapor, condensation, and humidity, you can watch a miniature cloud form, grow, and eventually release a gentle drizzle—all while learning about the water cycle and atmospheric physics. This hands‑on activity is perfect for students, science enthusiasts, or anyone curious about how clouds develop in the real world.
How to Create a Rain Cloud in a Jar
To build a Rain Cloud in a Jar, you’ll need a few simple supplies and a clear understanding of the science behind cloud formation. The experiment demonstrates how water vapor condenses into tiny droplets when cooled, forming a cloud that can produce precipitation when the droplets coalesce.
Materials and Setup
- Clear glass jar (1‑liter size works well)
- Hot water (not boiling)
- Ice cubes or a cold pack
- Aluminum foil or a small plastic cup
- Optional: a small piece of cotton or a cotton ball
- Optional: a thermometer to monitor temperature
Step‑by‑Step Instructions
- Heat the Water: Pour hot water into the jar until it’s about three‑quarters full. The heat increases the amount of water vapor in the air inside the jar.
- Seal the Jar: Quickly place the lid on the jar, ensuring it’s airtight. This traps the warm, moist air inside.
- Cool the Top: Place the jar on a flat surface and lay a small piece of aluminum foil or a plastic cup over the opening. Then, put ice cubes or a cold pack on top of the foil/cup. The cold surface will cool the air just above the jar’s opening.
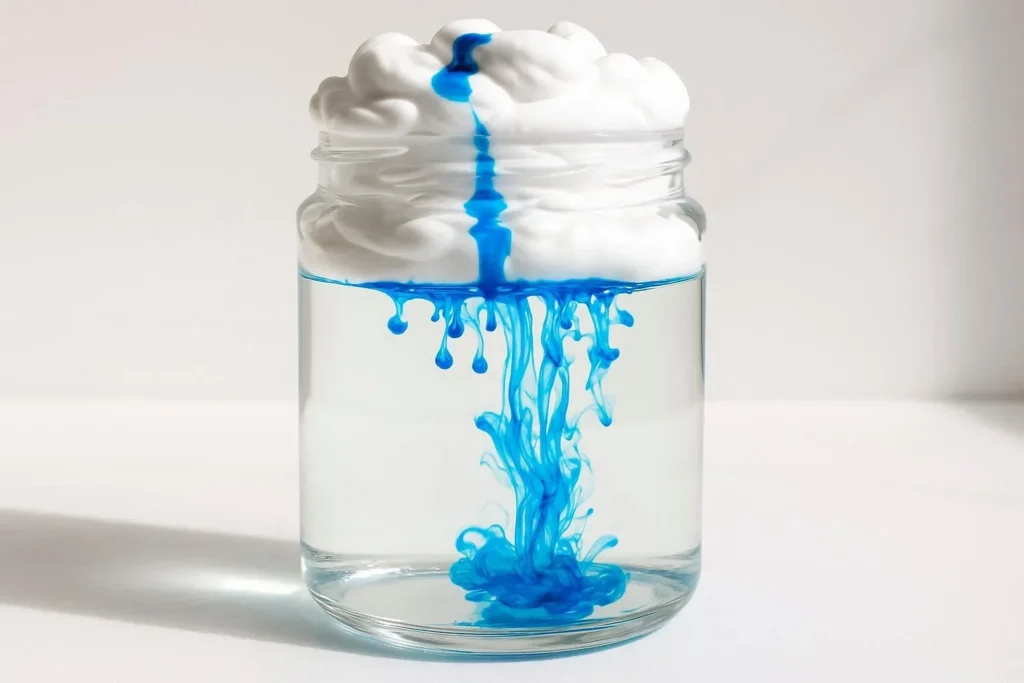
- Watch the Cloud Form: Within a few minutes, you’ll see a white, fluffy cloud appear inside the jar. This cloud is formed by condensation of water vapor onto microscopic particles.
- Observe the Rain: As the droplets in the cloud grow larger, they will eventually fall as a gentle drizzle inside the jar. The process mimics how real clouds produce rain when droplets coalesce and become heavy enough to fall.
- Optional Enhancements: Adding a cotton ball to the jar’s interior can provide more nucleation sites for condensation, speeding up cloud formation. A thermometer can help you track the temperature changes that drive the experiment.
Scientific Principles Behind the Experiment
The Rain Cloud in a Jar experiment is a microcosm of the atmospheric water cycle. When you heat water, it evaporates, turning into invisible water vapor. This vapor rises and, when it encounters cooler air, it condenses into tiny droplets that cluster around particles—forming a cloud. The key physics concepts at play include:
- Evaporation: The transition of liquid water to vapor, driven by heat.
- Condensation: The reverse process, where vapor turns back into liquid droplets when cooled.
- Humidity: The amount of water vapor present in the air, which determines how quickly condensation occurs.
- Droplet Coalescence: When droplets collide and merge, they grow larger and eventually fall as precipitation.
For a deeper dive into cloud physics, you can explore resources such as the Wikipedia article on clouds or the NOAA explanation of cloud formation.
Applications and Educational Value
Beyond its visual appeal, the Rain Cloud in a Jar experiment offers numerous educational benefits. It provides a tangible demonstration of abstract meteorological concepts, making it ideal for:
- High school science classes covering the water cycle and atmospheric science.
- STEM workshops for younger students, fostering curiosity about natural processes.
- Home science projects that encourage experimentation and observation.
- Public science demonstrations at museums or community centers.
Teachers can extend the activity by asking students to record the time it takes for the cloud to form, the amount of rain produced, or how different temperatures affect the outcome. These data points can lead to discussions about climate change, weather forecasting, and the importance of humidity in everyday life.
Safety Tips and Common Mistakes
While the experiment is generally safe, it’s important to handle hot water carefully to avoid burns. Additionally, ensure the jar is sturdy and the lid fits tightly to prevent spills. Common pitfalls include:
- Using water that isn’t hot enough, which slows evaporation.
- Leaving the jar open for too long, allowing the vapor to escape.
- Not cooling the jar’s opening sufficiently, which can delay cloud formation.
- Using a jar with a warped or uneven lid, which can compromise the airtight seal.
By following the steps precisely and maintaining a controlled environment, you’ll achieve a clear, visible cloud that demonstrates the elegance of atmospheric science.
Take the Experiment Home: A DIY Weather Lab
Now that you understand how to create a Rain Cloud in a Jar, you can set up a mini weather lab at home. Combine this experiment with others—such as a homemade barometer or a simple thermometer—to explore how temperature, pressure, and humidity interact. For more inspiration, check out the NASA Education portal and the ScienceDaily cloud articles for cutting‑edge research and ideas.
Conclusion: Your Own Miniature Weather System
Creating a Rain Cloud in a Jar is more than a fun science trick—it’s a gateway to understanding the complex processes that govern our planet’s weather. By observing how water vapor condenses, forms droplets, and eventually falls as rain, you gain firsthand insight into the water cycle and atmospheric dynamics. Whether you’re a student, educator, or curious hobbyist, this experiment offers a hands‑on lesson in physics, chemistry, and environmental science.
Ready to explore the skies in a jar? Grab your materials, follow the steps, and watch a miniature rain cloud form right before your eyes. Share your results and inspire others to discover the science of clouds—one jar at a time!
Frequently Asked Questions
Q1. What materials do I need to make a Rain Cloud in a Jar?
You’ll need a clear 1‑liter glass jar, hot water, ice cubes or a cold pack, a lid, and optionally a small piece of aluminum foil or a plastic cup to cover the opening. A cotton ball and a thermometer can enhance the experiment, but are not essential.
Q2. Why does the cloud form inside the jar?
The hot water evaporates, filling the jar with water vapor. When the top of the jar is cooled by ice, the vapor condenses onto microscopic particles, forming tiny droplets that cluster into a visible cloud.
Q3. How long does it take for the cloud to start raining?
Typically, a cloud appears within 2–5 minutes after cooling the jar’s opening. The droplets grow and coalesce over the next 5–10 minutes, eventually producing a gentle drizzle inside the jar.
Q4. Can I use a plastic bottle instead of a glass jar?
Yes, a clear plastic bottle can work, but glass is preferred because it is more heat‑resistant and provides a clearer view of the cloud formation. Ensure the bottle has a tight‑sealing lid.
Q5. What safety precautions should I follow?
Handle hot water carefully to avoid burns, use a sturdy jar with a secure lid, and keep the experiment away from children who might try to open the jar while it’s still hot. Always supervise the experiment if kids are involved.