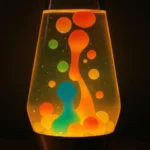
Creating a DIY Rainbow Jar is a delightful way to bring a burst of color into any room while also offering a hands‑on science experiment that teaches density and light refraction. This step‑by‑step guide walks you through gathering the right supplies, mixing vivid hues, and layering them to mimic the natural spectrum. Whether you’re a parent looking for a rainy‑day activity, a teacher seeking a classroom demonstration, or a craft enthusiast eager for a new project, the finished jar becomes both a decorative piece and an educational tool.
📱 Download Our Apps on Google Play
Click any app below to install it from the Google Play Store.


DIY Rainbow Jar: Materials Needed
- Clear glass jar or wide‑mouth bottle (preferably with a screw‑top lid)
- Distilled water – 4 to 6 cups, depending on jar size
- Food‑grade coloring agents (liquid or gel) in red, orange, yellow, green, blue, and purple
- Glycerin or corn syrup – 1‑2 tablespoons per layer to increase viscosity
- Spoon or small funnel for precise pouring
- Measuring spoons and a kitchen scale (optional for exact ratios)
- Stirring sticks or clean popsicle sticks
- Protective gloves and a clean workspace
For additional reading on the chemistry behind layered liquids, see the Density article on Wikipedia. The jar itself functions as a simple container; learning more about its design can be useful, so you might explore the Jar entry on Wikipedia for background.
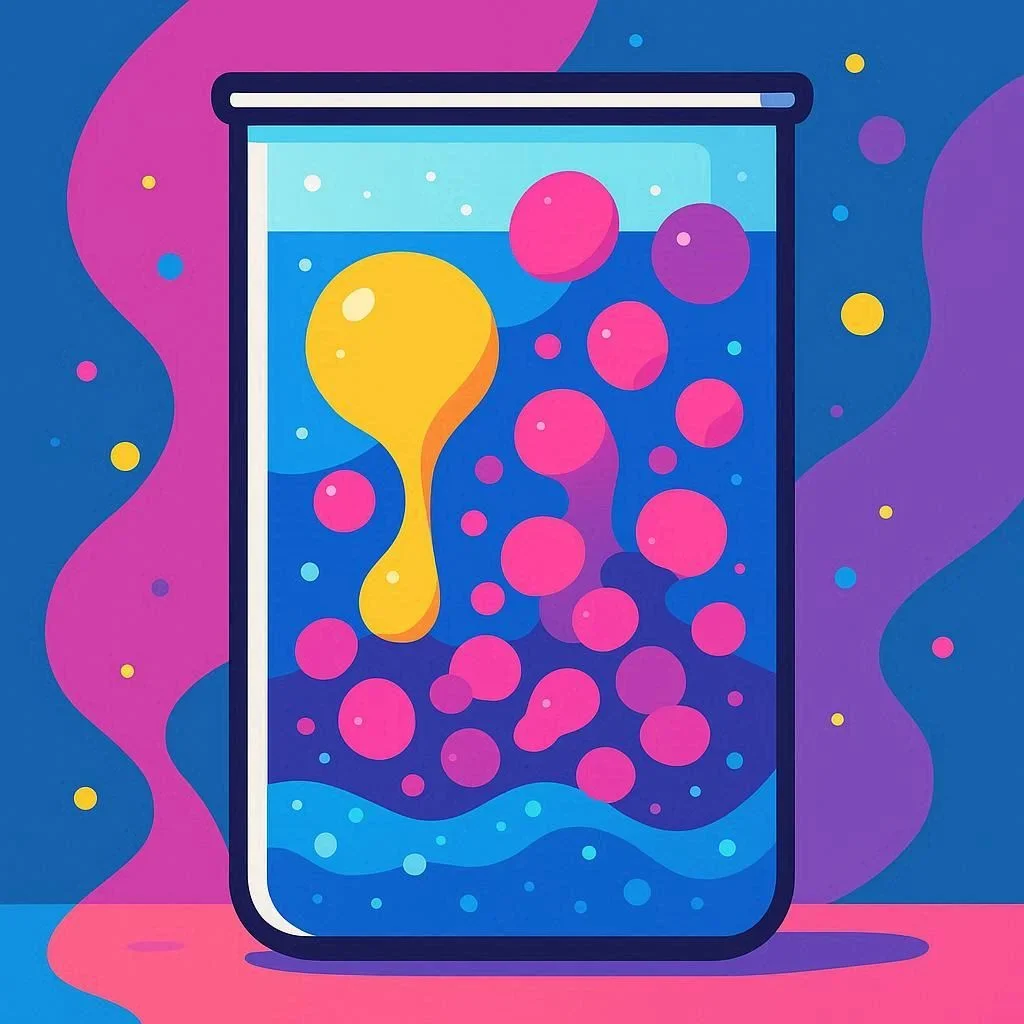
DIY Rainbow Jar: Step 1 – Prepare the Base Layer
Start by filling a small measuring cup with one cup of distilled water. Add a few drops of your chosen base color—traditionally red—then stir in a teaspoon of glycerin. Glycerin makes the solution denser, allowing it to sit beneath lighter layers without mixing. Pour the colored mixture gently into the jar using a funnel, letting it coat the bottom. This first layer sets the tone for the rainbow and demonstrates the principle of how a rainbow forms through light dispersion.
DIY Rainbow Jar: Step 2 – Create Vibrant Colored Layers
Repeat the process for each subsequent hue, adjusting the glycerin amount slightly: the higher you want a layer to sit, the less glycerin you’ll need because the previous layers become increasingly heavy. For orange, mix a teaspoon of corn syrup instead of glycerin to vary the density subtly. Continue with yellow, green, blue, and finally purple. Patience is key—pour each layer slowly along the side of the jar to minimize turbulence. If you notice any mixing, let the jar sit for a few minutes; the layers will settle due to differences in density.
For a deeper scientific explanation of why layered liquids remain distinct, NASA provides an excellent resource for students: NASA Education for Students. This page outlines basic physics concepts that underpin the visual effect.
DIY Rainbow Jar: Step 3 – Seal and Display Your Jar
Once all six colors are layered, securely fasten the jar’s lid. If you plan to place the jar on a surface where it could tip, consider adding a rubber ring around the base for stability. Position the jar where natural light can shine through; sunlight will enhance the vividness of each band, creating a miniature spectrum that changes with the angle of view. For safety tips when handling glass containers, consult the CDC’s water safety guidelines at CDC Water Safety.
Beyond decoration, your DIY Rainbow Jar can serve as a conversation starter about topics like light, color theory, and density. Teachers often use it as an entry point for a lesson on the electromagnetic spectrum, linking everyday crafts to classroom curricula.
DIY Rainbow Jar: Tips for Longevity and Safety
- Use distilled water to prevent mineral buildup that could cloud the layers over time.
- Store the jar away from direct heat to avoid expansion that may cause the lid to loosen.
- Handle with clean gloves to keep fingerprints off the glass, preserving visual clarity.
- Refresh colors annually if you notice fading; the process can be repeated without needing a new jar.
These suggestions draw on best practices from craft institutions and scientific labs, ensuring that your project remains both beautiful and durable.
Educational Benefits of a DIY Rainbow Jar
Integrating this craft into a lesson plan aligns with STEM education goals. Students observe the relationship between density and color, experiment with ratios, and develop fine motor skills while pouring. The visual impact reinforces abstract concepts, making them accessible. Moreover, the activity encourages curiosity—children often ask why the colors stay separate, prompting discussions about molecular weight and solubility.
Ready to brighten your space and spark scientific wonder? Create your own DIY Rainbow Jar today and share the results on social media using #RainbowJarDIY. Need more craft inspiration? Visit our blog for additional projects that combine creativity with learning.
Frequently Asked Questions
Q1. How can I keep the color layers from mixing?
Pour each liquid slowly against the side of the jar using a funnel or a spoon to minimize turbulence. Let each layer settle for a minute before adding the next one. Adding glycerin or corn syrup increases the density of the lower layers, helping them stay separate. Avoid shaking or moving the jar until all layers are fully set.
Q2. What type of jar works best for a rainbow jar?
A clear, wide‑mouth glass jar or bottle with a screw‑top lid is ideal because it lets you see the layers clearly and provides a smooth opening for precise pouring. Plastic containers can sometimes tint the colors or become hazy over time. Choose a jar that is tall enough to accommodate at least six distinct layers.
Q3. Can I use regular tap water instead of distilled water?
Distilled water is recommended because it lacks minerals that can cause clouding or discoloration as the jar ages. Tap water will work for a short‑term project, but you may notice haziness or color fading after several weeks. If you must use tap water, consider filtering it first.
Q4. How long will my DIY Rainbow Jar stay vibrant?
When sealed tightly and kept out of direct heat, the colors can remain bright for many months, often up to a year. Exposure to sunlight accelerates fading, so display the jar in indirect light if possible. If colors dull, you can refresh individual layers by adding more colored solution.
Q5. Is this project safe for children?
Yes, the activity is safe when supervised. Use food‑grade coloring, wear gloves to keep hands clean, and keep the jar out of reach of very young children who might try to drink it. Avoid hot water and always secure the lid to prevent accidental spills.
Related Articles

100+ Science Experiments for Kids
Activities to Learn Physics, Chemistry and Biology at Home
Buy now on Amazon
Advanced AI for Kids
Learn Artificial Intelligence, Machine Learning, Robotics, and Future Technology in a Simple Way...Explore Science with Fun Activities.
Buy Now on Amazon
Easy Math for Kids
Fun and Simple Ways to Learn Numbers, Addition, Subtraction, Multiplication and Division for Ages 6-10 years.
Buy Now on Amazon🚀 Try These Free Android Apps
Download these useful apps directly from the Google Play Store.