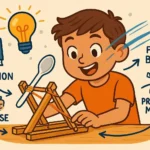
Creating a DIY balloon car is a surprisingly effective way to study forces using DIY balloon cars. When a child or beginner inflates a balloon, ties it off, and releases the stored air, the resulting thrust provides a tangible demonstration of Newton’s third law, air pressure, and friction. This low‑cost, hands‑on project turns abstract physics concepts into observable motion, making it ideal for classroom STEM activities, homeschooling, or after‑school clubs. In the next 1,200 words we’ll explore why balloon cars work, how to design a reliable chassis, ways to measure speed and distance, and how to extend the experiment for deeper learning—all while keeping safety and fun at the forefront.
Study Forces Using DIY Balloon Cars: Understanding Thrust
The core force that propels a balloon car is thrust, created when the high‑pressure air inside the balloon escapes through a narrow opening. According to Newton’s third law, every action has an equal and opposite reaction; the air pushes backward, and the car moves forward. This simple principle also illustrates the concept of air pressure, a secondary keyword that links everyday phenomena to scientific theory. By adjusting the balloon’s size or the nozzle diameter, learners can see how thrust changes proportionally, reinforcing the relationship between force, mass, and acceleration (F = ma). For a deeper theoretical background, consult the Wikipedia article on thrust and the NASA explanation of thrust.
Study Forces Using DIY Balloon Cars: Designing the Chassis
Before the car can move, it needs a sturdy yet lightweight chassis. The design should minimize friction while providing enough structural integrity to hold the balloon, wheels, and axle. Typical materials include cardboard, lightweight wooden strips, or recycled plastic bottles. When constructing the chassis, consider the following secondary keywords: experimental design, balance, and center of mass. A well‑balanced car reduces unwanted torque that can cause it to veer off course.
- Thin cardboard or foam board (1/8″ thickness)
- Four wooden skewers or thin plastic straws for axles
- Two bottle‑cap wheels (or recycled bottle caps)
- One latex balloon (large party size works best)
- Clear tape or hot glue
- Scissors or a craft knife (adult supervision required)
After cutting the base to a rectangular shape (approximately 12 cm × 5 cm), attach the axles near the ends, ensuring they rotate freely. Then mount the wheels onto the axles; the wheel’s inner rim should sit snugly around the axle to reduce wobble. Finally, secure the balloon to a straw or small tube that will act as a nozzle, and attach this assembly to the rear of the chassis with tape, leaving the balloon’s opening accessible for inflation.
Study Forces Using DIY Balloon Cars: Measuring Motion
Once the car is built, the next step is quantifying the forces at work. By measuring how far the car travels in a set amount of time, students can calculate average speed (v = d/t) and, with known mass, estimate the net force using Newton’s second law. Simple tools such as a stopwatch, measuring tape, and a marker to note the start line are sufficient. For more precise data, a smartphone app that tracks motion via accelerometer can be employed; many free apps are available on iOS and Android platforms.
When recording results, encourage learners to note variables that could affect performance, such as:
- Balloon size (volume of air)
- Nozzle diameter (restriction of airflow)
- Surface texture (smooth classroom floor vs. carpet)
- Car weight (additional payloads)
Analyzing these variables helps students practice the scientific method, reinforcing the secondary keyword hands‑on learning. For guidance on designing experiments, see the U.S. Department of Education’s resources on STEM and the Science Buddies balloon car project.
Study Forces Using DIY Balloon Cars: Extending the Experiment
After mastering the basic balloon car, educators can introduce extensions that deepen understanding of force concepts. One popular variation replaces the single balloon with a series of smaller balloons released sequentially, demonstrating how continuous thrust can be engineered. Another approach adds a lightweight sail to the car, allowing students to compare wind‑driven thrust versus air‑expelled thrust, thereby linking the secondary keyword air pressure to broader aerodynamic principles.
Advanced students might experiment with incline planes to study the component of gravitational force along a slope, or use a ramp to calculate the coefficient of friction between wheels and surface. Data from these variations can be plotted on graphs to visualize relationships, an essential skill in scientific literacy.
For educators seeking curriculum alignment, the National Science Foundation provides standards linking hands‑on experiments to the Next Generation Science Standards (NGSS), ensuring that the balloon car activity meets national educational goals.
Conclusion
From a simple inflated balloon to a moving miniature vehicle, the DIY balloon car encapsulates core physics concepts in an accessible format. By studying forces using DIY balloon cars, learners experience thrust, friction, and Newton’s laws in real time, fostering curiosity and analytical thinking. Whether you’re a teacher planning a classroom lesson, a parent looking for a weekend STEM project, or a student eager to explore experimental physics, this activity provides a solid foundation for deeper scientific inquiry.
Ready to ignite your students’ passion for physics? Download our free printable worksheet, join our monthly webinar on hands‑on STEM projects, and start building balloon cars today! Click here to get started.
Frequently Asked Questions
Q1. How does a balloon car demonstrate thrust?
When the balloon releases air, the high‑pressure stream pushes backward, producing an equal forward force on the car. This reaction force is a direct illustration of Newton’s third law. The magnitude of thrust changes with balloon size and nozzle opening.
Q2. What materials are best for building a lightweight chassis?
Cardboard, foam board, thin plywood, or recycled plastic bottles work well because they are light yet sturdy. Choose a material that can be easily cut and that won’t add unnecessary weight. Balancing the car’s center of mass helps reduce wobble and improves motion.
Q3. How can I measure the speed of my balloon car accurately?
Use a stopwatch and a measuring tape to record the distance traveled over a set time interval. For greater precision, smartphone apps that access the accelerometer can track velocity and acceleration in real time. Record multiple trials and calculate an average to reduce random error.
Q4. Which variables affect the distance a balloon car travels?
Key variables include balloon volume, nozzle diameter, wheel friction, surface texture, and total car mass. Adding payloads or using different wheel materials will change the distance. Systematically altering one factor at a time helps illustrate cause‑and‑effect relationships.
Q5. How can I extend the balloon car experiment for older students?
Introduce concepts like coefficient of friction, incline planes, or multi‑stage thrust using several balloons. Students can plot force versus distance graphs and compare experimental data to theoretical predictions. Linking the activity to NGSS standards reinforces curriculum relevance.