Creating slime that glows under black light is a fun science‑backed activity that combines chemistry, art, and a dash of neon magic. This DIY project not only produces a mesmerizing, sticky substance but also teaches kids and adults about fluorescence, polymers, and safe handling of household chemicals. In the next 1,200 words, you’ll learn the step‑by‑step process, the science behind UV‑reactive slime, safety tips, and creative variations to keep the glow going all night long.
📱 Download Our Apps on Google Play
Click any app below to install it from the Google Play Store.


Understanding the Science of UV‑Reactive Slime
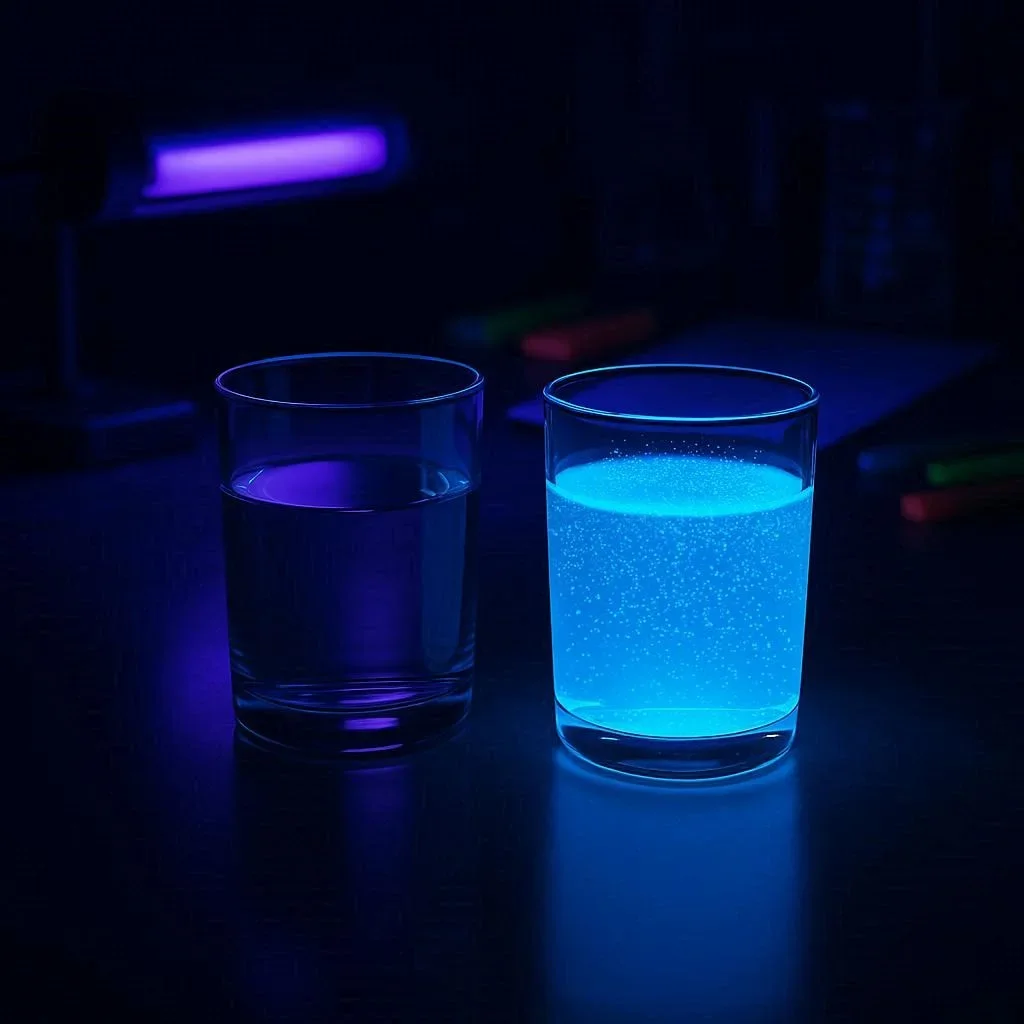
Before diving into the recipe, it helps to know why certain materials glow when exposed to a black light. Fluorescence occurs when a substance absorbs invisible ultraviolet (UV) light and re‑emits it as visible light, producing a bright, neon effect. Food‑grade additives like tonic water (which contains quinine) and certain highlighter inks are common fluorescent agents. When mixed into a polymer base such as polyvinyl alcohol (PVA) or the classic white glue (polyvinyl acetate, or PVA), the result is a stretchy, glow‑in‑the‑dark slime that shimmers under UV illumination.
Materials You’ll Need for Black Light Slime
Gather these items before you start. All ingredients are widely available at grocery stores, craft shops, or online retailers.
- White school glue (PVA glue, about ½ cup)
- Water (¼ cup, plus extra for adjusting texture)
- Activating solution: ½ teaspoon of borax dissolved in ¼ cup warm water, or a mixture of liquid laundry detergent and contact lens solution (the latter contains boric acid).
- Fluorescent additive: 2–3 tablespoons of tonic water, or a few drops of neon highlighter ink.
- Optional color: food‑grade neon food coloring for added vibrancy.
- Black light (UV‑A lamp, 365 nm wavelength) – you can find affordable models on major e‑commerce sites.
Step‑by‑Step Guide to Make Slime That Glows Under Black Light
Follow these precise steps for consistent results. The total preparation time is about 10–15 minutes, plus a short curing period.
- Mix the base. In a mixing bowl, combine ½ cup of white glue with ¼ cup of water. Stir until the mixture is uniform and free of bubbles.
- Add the fluorescent component. Pour 2–3 tablespoons of tonic water into the glue mixture. If you prefer a brighter hue, add a few drops of neon highlighter ink or a splash of neon food coloring. Stir well; the solution will begin to look slightly cloudy.
- Activate the slime. Slowly drizzle the borax solution into the mixture while continuously stirring. You’ll notice the mixture thickening within seconds. Keep adding the activator a little at a time until the slime pulls away from the sides of the bowl and forms a cohesive mass.
- Knead for consistency. Remove the slime from the bowl and knead it with clean hands for 1–2 minutes. This step distributes the fluorescent agent evenly throughout the polymer matrix.
- Test under black light. Dim the lights, turn on your UV lamp, and watch the slime glow. If the fluorescence is faint, you can add a few more drops of tonic water or highlighter ink and knead again.
Store the finished slime in an airtight container to prevent drying. The glow effect will remain for weeks as long as the fluorescent additive stays intact.
Safety Tips and Troubleshooting
Even though the ingredients are generally safe, it’s important to follow best practices to protect skin and eyes.
- Wear gloves if you have sensitive skin; some people react to borax.
- Use the black light in a well‑ventilated area; avoid staring directly at the UV source.
- If the slime is too sticky, add a pinch more borax solution.
- If it becomes too rubbery, incorporate a small amount of warm water and knead to soften.
For more detailed safety guidelines, refer to the CDC’s chemical safety resources and the EPA’s household chemicals page.
Creative Variations to Elevate Your Glow Slime
Once you master the basic recipe, experiment with these variations to keep the fun fresh.
- Glitter infusion: Add UV‑reactive glitter for a sparkling effect that reflects the black light.
- Layered slime: Create multiple batches with different fluorescent colors, then layer them for a rainbow‑like glow.
- Temperature‑sensitive slime: Mix in a small amount of thermochromic pigment; the slime will change color as it warms, while still glowing under UV.
- Neon slime bubbles: Use a straw to blow bubbles through the slime; they’ll appear as glowing orbs under the black light.
These ideas are inspired by popular science‑craft platforms such as Science Buddies and can be tailored for classroom demonstrations or party favors.
Conclusion: Bring the Glow to Any Event
Creating slime that glows under black light is a simple, inexpensive, and educational activity that yields spectacular visual results. By understanding the role of fluorescent agents, following a reliable recipe, and observing safety protocols, you can produce endless batches of neon slime for birthday parties, science fairs, or just a rainy‑day experiment. Ready to light up your next gathering? Grab the ingredients, turn on the UV lamp, and share the glowing fun with friends and family today!
Frequently Asked Questions
Q1. What ingredients are needed to make slime that glows under a black light?
To make glowing slime you need white PVA glue, water, an activator such as a borax solution, and a fluorescent additive like tonic water or highlighter ink. Adding a few drops of neon food coloring can boost the visual effect. A black‑light (UV‑A) source is required to see the fluorescence. All ingredients are safe and easy to find at grocery or craft stores.
Q2. How does the fluorescence in slime work?
Fluorescence occurs when a substance absorbs invisible UV light and re‑emits it as visible light. Ingredients such as quinine in tonic water or dyes in highlighters contain molecules that exhibit this behavior. When these molecules are mixed into the slime polymer, the entire mass glows when illuminated by a black light.
Q3. Can I make the slime without borax?
Yes, you can substitute a mixture of liquid laundry detergent and contact‑lens solution, which also contains boric acid to cross‑link the glue. This alternative works well for children who are sensitive to borax, but the slime may be slightly softer.
Q4. How long will the glow last?
The fluorescence remains as long as the fluorescent additive stays in the slime. Stored in an airtight container away from direct sunlight, the slime can keep its glow for several weeks. If the glow fades, simply knead in a few more drops of tonic water.
Q5. Is the glowing slime safe for kids?
The slime uses non‑toxic, food‑grade ingredients, but it’s still advisable to supervise children, especially when handling borax or detergent. Encourage washing hands after play and keep the slime out of mouths. With proper supervision, it’s a safe and educational activity.
Related Articles

100+ Science Experiments for Kids
Activities to Learn Physics, Chemistry and Biology at Home
Buy now on Amazon
Advanced AI for Kids
Learn Artificial Intelligence, Machine Learning, Robotics, and Future Technology in a Simple Way...Explore Science with Fun Activities.
Buy Now on Amazon
Easy Math for Kids
Fun and Simple Ways to Learn Numbers, Addition, Subtraction, Multiplication and Division for Ages 6-10 years.
Buy Now on Amazon🚀 Try These Free Android Apps
Download these useful apps directly from the Google Play Store.


