Creating Bouncy Balls With Glue is a simple yet fascinating science experiment that turns everyday household items into a fun, educational activity for kids and adults alike. By combining a common adhesive with a mild chemical, you can produce a rubbery, elastic sphere that bounces high and stays together for weeks. This guide walks you through the science behind the reaction, the materials you’ll need, safety tips, and creative variations to keep the excitement going.
How Glue and Borax Work Together
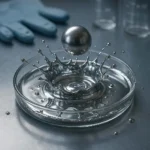
The magic of Bouncy Balls With Glue lies in a chemical reaction between polyvinyl acetate (the glue) and sodium borate (borax). When the two substances mix, the borate ions cross‑link the polymer chains in the glue, forming a three‑dimensional network. This network traps water molecules, creating a gel-like material that is both flexible and resilient. The result is a ball that can stretch, compress, and rebound—just like a rubber ball.
For a deeper dive into the chemistry, you can read the Wikipedia entry on Borax, which explains its properties and common uses. The reaction is safe when handled properly, but it’s always wise to follow safety guidelines and keep the materials out of reach of very young children.
Materials You’ll Need
- White school glue (polyvinyl acetate) – 1 cup
- Water – 1 cup
- Borax powder – 1 tablespoon
- Food coloring (optional) – a few drops
- Mixing bowl and spoon
- Measuring cups and spoons
- Gloves and safety goggles (recommended)
- Paper towels or a clean cloth for cleanup
All of these items are inexpensive and can be found in most households or local craft stores. If you’re looking for a high‑quality glue, the 3M adhesive line offers a reliable, non‑toxic option.
Step‑by‑Step Instructions
Follow these steps to create your own bouncy balls. The process is straightforward, but precision in measurements ensures the best results.
- Prepare the glue mixture. In a bowl, pour 1 cup of white glue. Add 1 cup of water and stir until the mixture is uniform. If you want colored balls, add a few drops of food coloring now.
- Dissolve the borax. In a separate cup, dissolve 1 tablespoon of borax in 1 cup of warm water. Stir until the powder is completely dissolved.
- Combine the solutions. Slowly pour the borax solution into the glue mixture while stirring continuously. The mixture will thicken and become slightly sticky.
- Shape the balls. Wet your hands with water to prevent sticking. Scoop out small portions of the mixture and roll them between your palms to form spheres. Aim for a diameter of about 1–2 inches for optimal bounce.
- Let them set. Place the balls on a sheet of wax paper or a clean surface and let them dry for 24–48 hours. The longer they dry, the firmer they become.
- Test the bounce. Once dry, gently drop the ball from a height of about 3 feet onto a hard surface. A well‑made ball should bounce back to at least 2 feet.
Remember to keep the workspace well‑ventilated and to wash your hands after handling the materials. For more safety information on borax, the CDC borax safety page provides useful guidelines.
Why This Experiment Is Great for Kids
Beyond the fun of bouncing, this activity introduces children to basic principles of chemistry, such as polymer science and cross‑linking. It also encourages:
- Observation skills – noticing how the mixture changes consistency.
- Fine motor control – shaping the balls by hand.
- Scientific thinking – hypothesizing why the balls bounce and testing different variables (e.g., varying borax amounts).
Teachers and parents can use this experiment as a hands‑on lesson in a classroom or at home. The Science Kids borax activity page offers additional ideas for extending the lesson.
Creative Variations and Troubleshooting
While the basic recipe works well, you can tweak the experiment to explore different textures and bounciness:
- Adjust borax concentration. More borax yields a firmer ball, while less borax produces a softer, more pliable sphere.
- Use different glues. Experiment with clear or colored glue to see how the polymer type affects the final product.
- Add glitter or small beads. Mix in decorative elements for a personalized touch.
- Try a “super‑bouncy” version. Add a small amount of baking soda to the borax solution to create a slightly different cross‑linking effect.
If your balls don’t bounce, check for common issues: insufficient borax, uneven mixing, or too much water. Adjusting the ratios and ensuring thorough stirring usually resolves the problem.
Safety First: Handling Borax and Glue
Although the materials are generally safe, it’s important to follow these precautions:
- Wear gloves and goggles if you have sensitive skin or eyes.
- Keep the experiment out of reach of toddlers who might ingest the mixture.
- Store borax in a sealed container and label it clearly.
- Wash hands thoroughly after handling the materials.
For detailed safety guidelines, consult the CDC borax safety page and the peer‑reviewed literature on borax toxicity.
Conclusion: Bounce Into Learning
Creating Bouncy Balls With Glue is more than a fun pastime—it’s a gateway to understanding how everyday chemicals can transform into exciting, interactive materials. By following the steps above, you’ll not only produce a high‑bouncing sphere but also spark curiosity about the science behind it. Whether you’re a parent, teacher, or hobbyist, this experiment offers a hands‑on way to explore polymer chemistry, safety practices, and creative problem‑solving.
Ready to start bouncing? Grab your glue, borax, and a splash of imagination—then dive into the science of bouncy balls today!
Frequently Asked Questions
Q1. What materials do I need to make Bouncy Balls With Glue?
You’ll need white school glue (polyvinyl acetate), water, borax powder, optional food coloring, a mixing bowl, measuring cups, a spoon, gloves, safety goggles, and paper towels for cleanup. All items are inexpensive and can be found in most households or local craft stores. If you want a higher quality glue, consider a 3M adhesive line. Keep the borax sealed and labeled to avoid accidental ingestion. Wash your hands after handling the materials.
Q2. How does borax make the glue bounce?
Borax (sodium borate) reacts with the polyvinyl acetate in the glue, creating cross‑links between polymer chains. This forms a three‑dimensional network that traps water molecules, giving the mixture a gel‑like consistency. The network’s elasticity allows the ball to compress and rebound, producing a high bounce. The reaction is safe when handled properly, but gloves and goggles are recommended for sensitive skin or eyes.
Q3. Can I use other types of glue for this experiment?
Yes, you can experiment with clear or colored glue to see how different polymer types affect the final product. Clear glue may produce a more translucent ball, while colored glue can add visual appeal. However, the consistency and cross‑linking may vary, so you may need to adjust the borax concentration accordingly. Always test a small batch first to ensure the desired bounce.
Q4. How long do the bouncy balls last once they’re made?
When properly dried for 24–48 hours, the balls can remain elastic for several weeks or even months if stored in a dry, cool place. Over time, they may lose some elasticity due to environmental factors like humidity or temperature. If the balls become too soft, you can add a small amount of borax to the mixture and re‑bake them to restore firmness.
Q5. Is borax safe for kids to use in this experiment?
Borax is generally safe when used in small amounts and with proper precautions. Keep the powder out of reach of toddlers who might ingest it, and wear gloves and goggles if you have sensitive skin or eyes. Follow the CDC’s borax safety guidelines and wash hands thoroughly after handling. With these measures, children can safely enjoy the science behind the bouncy balls.