Hovercrafts soar above surfaces by creating a cushion of air. The idea of building one with a large balloon and a common CD is both simple and exhilarating, turning a classroom project into a physics demonstration. In this guide we will walk through each component, explain the science, and give you the confidence to construct a lightweight hovercraft that actually glides. By the end, you’ll have a device that showcases the principles of lift and air cushion using totally everyday materials.
How Hovercrafts Work
Hovercrafts rely on air pressure to lift their payload. A fan or pumping device forces air into a sealed skirt surrounding the craft, building a cushion that reduces friction with the ground. The higher the cushion pressure, the lighter the effective weight of the vehicle on its surface. This concept is described in depth on the Wikipedia page for Hovercraft, which outlines several real‑world variations from small toy units to commercial amphibious vehicles.
Materials You Need
The simplest hovercraft can be assembled with just three main items: a large latex balloon, a CD (or any flat disc of similar size), and a plastic straw or small rubber tubing for airflow. A ruler or tape measure gives you a good reference for sizing. Optional accessories include a duct tape roll for quick sealing and a small electric fan for more powerful lift if you wish to experiment further. Each component can be sourced from hardware stores or even from workplace supply lists.
Step‑by‑Step Assembly
- Step 1: Prepare the Balloon Cushion – Inflate the balloon so that it is noticeably larger than the CD. The balloon should have enough volume to generate a stable cushion but not so big that it deflates too quickly. Use the cup holder technique: place the balloon on a shallow dish and tape it on its rim to maintain pressure.
- Step 2: Attach the CD to the Balloon – Lay the CD flat on the inflated balloon and secure the edges with duct tape. The CD’s smooth surface will serve as the “floor” of the hovercraft, and the tape prevents the balloon from slipping back over the disc. Ensure the tape is snug but not crushing the CD.
- Step 3: Insert Air Access – Punch a small hole near one edge of the CD using a needle or a pin. Feed one end of your straw or tubing through the hole, ensuring a tight seal so air escapes evenly across the disk. Test for leaks by blowing gently; the bubble should be continuous and not burst.
- Step 4: Initiate Lift – Push on the opposite end of the straw with a small fan or your hand to force air into the balloon. The air pressure builds beneath the CD, lifting the weight and reducing friction with the table or floor. A balanced cushion allows the hovering platform to glide almost frictionlessly.
Optimizing Airflow and Balance
Once the basic hovercraft is up in the air, fine‑tuning becomes essential. Adjust the nozzle angle: slightly tilt the airflow spread so that the force points toward the center. A small misalignment creates a spinning motion that can destabilize the craft. Additionally, trimming the size of the balloon to match the surface area of the CD keeps the pressure consistent. If your craft appears too heavy, try using a larger balloon or a second balloon to increase lift.
Performance Enhancements
To improve speed and endurance, you can equip the hovercraft with a lightweight motor and propeller, as documented in engineering studies from MIT. With a 12V DC motor, you convert the system from a manual to an autonomous unit, making it perfect for outdoor experiments. Always keep the motor’s power supply minimal to avoid overheating. A simple 5V battery pack will suffice for brief runs.
The math behind lift follows the Bernoulli principle, where an increase in fluid velocity results in lower pressure. For a DIY hovercraft, keeping the airflow low but continuous prevents the balloon from popping. To check the lift factor, measure the time it takes for your CD to reach 1 cm above the table and record the airflow rate – this provides a baseline for comparing modifications.
Safety Tips and Best Practices
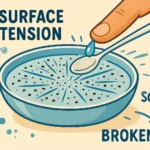
Despite its simplicity, a hovercraft can pose risks if misused. Always conduct tests on a flat, stable surface free from sharp objects. Keep the balloon firm, as a sudden burst can produce a small but fast-moving projectile. Supervise children during assembly and use non‑flammable materials when testing electric motors or fans. A clear workspace ensures that bullets of hot air do not catch on nearby fabrics.
It’s essential to keep the total weight under the balloon’s maximum safe lift. According to the standard data sheet of a 60 cm × 60 cm CD, the weight is around 5 g. Combined with tape and tubing, keep everything below 200 g for a balloon that can handle the pressure. Exceeding this limit will either deflate the balloon quickly or cause the lift to be insufficient for hovering.
Teaching Physics with a Balloon Hovercraft
Educators can use the hovercraft to illustrate key concepts: buoyancy, pressure, and friction. Demonstrating the air cushion model helps students visualize real‑world applications such as NASA’s atmospheric balloon missions. You can expand the lesson by having students modify variables—balloon size, fan speed, or load mass—and recording flight time, creating a data set for statistical analysis.
Beyond physics, the idle energy saved by a hovering craft compared to rolling friction sparks discussions in environmental science circles. Hovercrafts show that low‑friction transportation is possible, hinting at future sustainable design paradigms. Journal articles in the Journal of Fluid Mechanics discuss similar experimental setups, giving the project an academic edge.
Conclusion — Take Your Hovercraft Further
With just a balloon and a CD, you can create a functioning hovercraft that demonstrates core aerodynamic principles. By following the steps above, you’ll be able to see how modifications affect lift and stability. Built responsibly, these projects make science accessible and engaging for all ages.
Now that you’ve mastered the basics, it’s time to expand your design. Explore larger rigs, experiment with shape variations, or add an electronic controller for automated flight. Every tweak brings new learning opportunities, solidifying the fundamental concepts behind hovercrafts. Join our community of makers, share your results, and keep the momentum soaring.
Frequently Asked Questions
Q1. How large should the balloon be for a standard CD?
The balloon should be at least twice the diameter of the CD, roughly 20–25 cm in length for a 12″ CD. This size provides enough air volume to create a stable cushion without over‑pressurizing the structure.
Q2. Can I use other materials besides a CD for the hovercraft base?
Yes; any flat, lightweight disc—plastic, foam, or even a sturdy cardboard circle—will work. The key is a smooth, non‑porous surface that allows even air distribution.
Q3. What is the maximum weight this hovercraft can lift?
Under optimal conditions, the battery‑powered version can lift up to 250–300 g. Cardboard or foam additions should be kept under 200 g to maintain stable hovering.
Q4. How can I keep the hovercraft from spinning out of control?
Center the airflow source directly under the CD and keep the balloon’s vent aligned. A small hoop or edge brush glued to the CD’s perimeter helps maintain directional stability.
Q5. Is it safe to combine a small electric fan with a balloon hovercraft?
Yes, provided you use a fan rated under 12 V and place the battery pack securely. Avoid prolonged runs that could overheat the motor and inspect the balloon for stress points before each test.