Creating a mesmerizing optical toy doesn’t require a lab or expensive equipment—just a handful of everyday items and a love for light. In this step‑by‑step guide we’ll show you how to make DIY Kaleidoscopes that sparkle with color and geometry, perfect for classroom projects, family bonding, or a creative weekend hobby. By understanding basic principles of reflection and refraction, you’ll gain confidence in simple optics while crafting a beautiful, functional piece of art. Let’s dive into the materials, the building process, and tips for customizing your DIY Kaleidoscopes for maximum visual impact.
Materials You’ll Need for DIY Kaleidoscopes
- Three rectangular mirror strips (approximately 5 cm wide, 20 cm long) – antique mirror kits work well.
- Cardboard tube or sturdy PVC pipe (10–12 cm diameter, 20 cm long).
- Transparent plastic or acrylic sheet for the end caps.
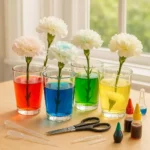
- Beads, sequins, tiny colored glass pieces, or shredded cellophane for the object chamber.
- Black matte spray paint or construction paper to coat interior surfaces.
- Glue gun, double‑sided tape, and a small screwdriver.
These components are easy to find at craft stores, hardware shops, or online retailers. For a deeper look at the physics behind mirror arrangements, see the Kaleidoscope Wikipedia entry. Understanding how light bounces between angled mirrors will help you troubleshoot any dull spots in your final device.
Step 1: Preparing the Body of Your DIY Kaleidoscopes
The outer tube forms the structural backbone and protects the delicate mirror assembly. Begin by cutting the cardboard or PVC pipe to a length of about 20 cm; this gives enough space for the mirror chamber and the object compartment. Paint the interior of the tube matte black or line it with black construction paper to absorb stray light and enhance contrast. Allow the coating to dry completely before proceeding.
Next, create two end caps: one solid cap for the viewing end and one perforated cap for the object chamber. Cut circles from the acrylic sheet that fit snugly inside the tube. For the viewing cap, drill a small central hole (about 5 mm) that will serve as the eye window. For the object cap, cut a series of irregular holes around the perimeter—these will let light and color fragments enter the mirror tunnel.
Step 2: Assembling the Mirror Chamber
The signature pattern of a kaleidoscope comes from three mirrors positioned in a triangular prism shape, typically at a 60‑degree angle to each other. Lay out the three mirror strips on a flat surface, forming a hollow equilateral triangle. Secure the corners with small dabbs of hot glue or double‑sided tape, ensuring that the reflective sides face inward. This creates a continuous reflective tunnel when the assembly is inserted into the tube.
Slide the completed mirror prism into the black‑painted tube, centering it so there is an even gap around the perimeter. The gap allows light from the object chamber to enter the mirror chamber at multiple angles, producing the dazzling symmetrical patterns.
If you want a more compact design, you can use a pre‑cut mirror kit; many educational suppliers offer kits that meet the exact angle specifications. For a deeper scientific perspective on mirror geometry, consult the Encyclopaedia Britannica article on kaleidoscopes.
Step 3: Adding the Object Chamber and Final Touches
Fill the space between the perforated end cap and the mirror chamber with a mixture of colorful items—beads, sequins, glitter, or finely shredded cellophane work well. The key is to use pieces small enough to move freely yet large enough to reflect distinct colors. Once filled, seal the object cap firmly onto the tube using the glue gun, making sure the holes remain unobstructed.
Attach the solid viewing cap to the opposite end of the tube. If you used a cardboard tube, you can secure the cap with tape; for PVC, a snug push‑fit will suffice. Test your DIY Kaleidoscopes by looking through the eye window and rotating the tube. Adjust the amount or type of interior objects until the patterns are vivid and continuous.
For educators seeking curriculum alignment, the MIT website offers lesson plans that integrate DIY Kaleidoscopes into middle‑school physics units, emphasizing concepts like symmetry and light reflection.
Customization Ideas and Troubleshooting Tips
Once you’ve mastered the basic build, experiment with variations to keep the project fresh:
- Change mirror angles: Using 45‑degree mirrors creates a different visual rhythm.
- Alter tube length: A longer tube provides a deeper field of view, while a shorter one yields tighter patterns.
- Mix materials: Incorporate transparent acrylic beads or tiny LED lights for a luminous effect.
- Decorate the exterior: Paint, stickers, or wood veneer can turn the kit into a personalized gift.
If the image appears dim or the colors seem muted, check these common issues:
- Ensure the interior of the tube is truly black; any stray white surface will scatter light.
- Verify that the mirrors are clean and free of fingerprints.
- Make sure the object chamber’s holes are not blocked by excess material.
These adjustments will enhance the clarity of the patterns and maintain the high visual quality expected of a well‑crafted optical toy.
Conclusion: Bring Light and Learning Home with DIY Kaleidoscopes
Building DIY Kaleidoscopes is an accessible way to explore the wonder of light, geometry, and color while fostering creativity and hands‑on problem solving. Whether you’re a teacher, parent, or hobbyist, the project blends scientific insight with artistic expression, delivering a tangible reminder of how simple materials can produce complex beauty.
Ready to start crafting your own kaleidoscopic masterpiece? Gather the supplies, follow the steps, and share your creations on social media using the hashtag #DIYKaleidoscopes. For more inspiring projects and detailed tutorials, explore our Smithsonian educational resources.

100+ Science Experiments for Kids
Activities to Learn Physics, Chemistry and Biology at Home
Buy now on Amazon
Advanced AI for Kids
Learn Artificial Intelligence, Machine Learning, Robotics, and Future Technology in a Simple Way...Explore Science with Fun Activities.
Buy Now on Amazon
Easy Math for Kids
Fun and Simple Ways to Learn Numbers, Addition, Subtraction, Multiplication and Division for Ages 6-10 years.
Buy Now on Amazon