Building a functional catapult using everyday craft supplies is a fantastic way to combine creativity with basic engineering principles. When you build catapults with popsicle sticks, you’re not just making a toy—you’re exploring the physics of levers, potential energy, and projectile motion in a hands‑on, memorable format. This project is perfect for weekend family fun, classroom STEM lessons, or anyone who enjoys DIY challenges that spark curiosity. In the next sections we’ll walk through every step, list the tools you’ll need, explain the science behind the motion, and share safety tips to ensure a successful launch every time.
📱 Download Our Apps on Google Play
Click any app below to install it from the Google Play Store.


Build Catapults With Popsicle Sticks: Materials and Tools
Before you start, gather all the components. Having everything on hand saves time and keeps the project flowing smoothly. You will need:
- 30–40 standard wooden popsicle sticks
- Wood glue or a non‑drying craft adhesive
- Rubber bands (medium strength)
- Mini clothespin or paperclip for the trigger
- Small plastic spoon or bottle cap for the launch arm
- Scissors and a ruler for precise cuts
Optional accessories such as masking tape, decorative paint, or a set of foam projectiles can personalize the design, but they are not required for a working model.
Build Catapults With Popsicle Sticks: Step‑by‑Step Assembly
The construction process is broken into three core phases: base creation, arm formation, and trigger mechanism. Follow each phase carefully to ensure structural integrity and optimal launch power.
Phase 1 – Constructing a Stable Base
Lay out six popsicle sticks side by side and glue them together to form a solid slab about 6 inches long. Once the glue dries, reinforce the base by attaching two more sticks perpendicular to the slab at each end, forming a rectangular frame. This geometry distributes the stress when the arm snaps forward and prevents the catapult from tipping over.
Phase 2 – Crafting the Launch Arm
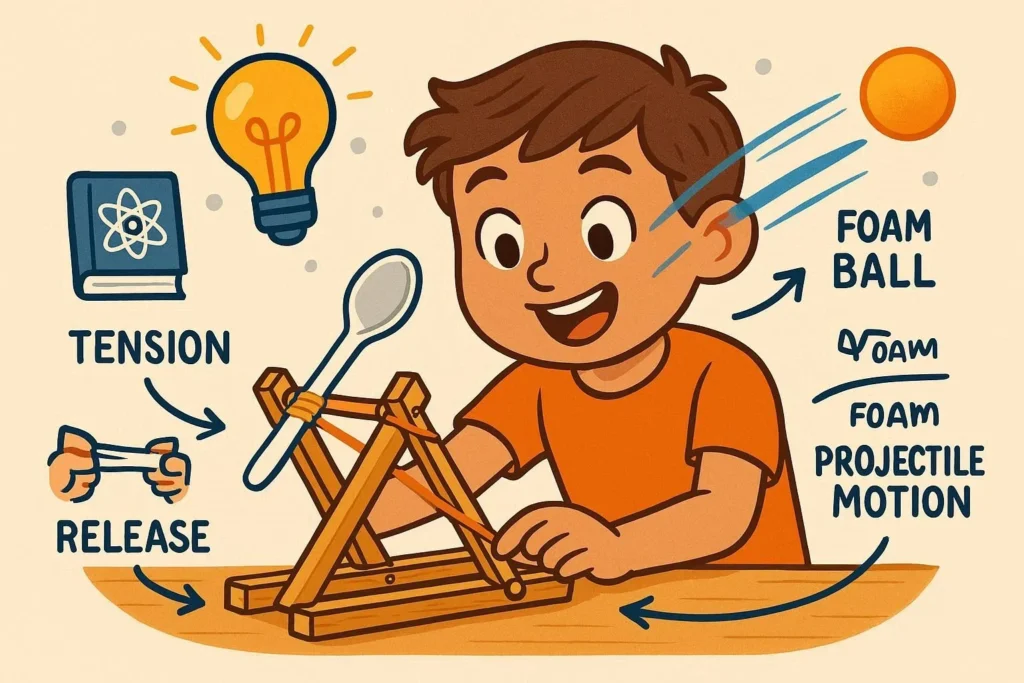
Take four popsicle sticks and stack them end‑to‑end, overlapping each joint by half a stick. Glue the overlaps securely, then attach a small plastic spoon at one extreme; the spoon will hold the projectile. On the opposite end, fasten a rubber band that will act as the tension source. The arm should be roughly 8 inches long to give enough leverage for a visible launch.
Phase 3 – Integrating the Trigger Mechanism
Position the launch arm across the base so that the spoon side points upward. Secure the arm’s midpoint to the base using a clothespin or a bent paperclip, leaving enough clearance for the rubber band to stretch. Loop a second rubber band around the arm’s rear end and hook it onto a second clothespin placed near the base. Pull the arm back, engage the trigger clothespin, and you’re ready to fire.
Build Catapults With Popsicle Sticks: Understanding the Science
The catapult operates on the principle of a lever, one of the six simple machines described in classic physics. When you pull the arm back, you store potential energy in the stretched rubber band. Releasing the trigger converts that potential energy into kinetic energy, propelling the projectile. This conversion illustrates energy transformation and demonstrates how small changes in angle or tension affect range, a concept covered in many middle‑school curricula.
For a deeper dive into the physics, see the Catapult article on Wikipedia. Educational institutions such as The Physics Classroom provide interactive simulations that reinforce these concepts.
Build Catapults With Popsicle Sticks: Safety and Testing Tips
Even a small-scale catapult can launch objects at surprising speeds. Follow these safety guidelines to protect participants and bystanders:
- Always aim the launch arm away from people, pets, and breakable objects.
- Use lightweight, soft projectiles such as foam balls or crumpled paper.
- Test the catapult in an open area, preferably outdoors on grass.
- Wear safety glasses if you plan to experiment with heavier projectiles.
After each launch, inspect the glue joints and rubber bands for wear. Replace any frayed bands to maintain consistent performance.
Build Catapults With Popsicle Sticks: Extending the Project
Once you’ve mastered the basic design, consider adding modifications to increase range or accuracy. Some ideas include:
- Adjusting the arm length for a longer lever ratio.
- Incorporating a threaded axle to fine‑tune the release angle.
- Using bungee cord instead of rubber bands for greater tension.
- Adding a target board and recording distances to turn the activity into a data‑driven experiment.
Educational resources such as the National STEM Association offer lesson plans that integrate catapult building into broader scientific inquiry.
Conclusion: Bring the Fun Home Today
By following these instructions, you’ll be able to build catapults with popsicle sticks that are sturdy, safe, and scientifically engaging. This project combines hands‑on craftsmanship with fundamental physics, making it an ideal activity for families, teachers, and hobbyists alike. Ready to launch your own mini‑engineered masterpiece?

100+ Science Experiments for Kids
Activities to Learn Physics, Chemistry and Biology at Home
Buy now on Amazon
Advanced AI for Kids
Learn Artificial Intelligence, Machine Learning, Robotics, and Future Technology in a Simple Way...Explore Science with Fun Activities.
Buy Now on Amazon
Easy Math for Kids
Fun and Simple Ways to Learn Numbers, Addition, Subtraction, Multiplication and Division for Ages 6-10 years.
Buy Now on Amazon🚀 Try These Free Android Apps
Download these useful apps directly from the Google Play Store.


