Foam with yeast is a captivating intersection of microbiology, chemistry, and culinary artistry. Whether you’re a home brewer, a science enthusiast, or simply curious about how tiny organisms can create delightful froth, this guide will walk you through the basics of cultivating foam using yeast. By the end, you’ll understand the science behind the bubbles, know which yeast to choose, set up a safe fermentation environment, and troubleshoot common foam‑related challenges.
📱 Download Our Apps on Google Play
Click any app below to install it from the Google Play Store.


Understanding the Science Behind Foam with Yeast
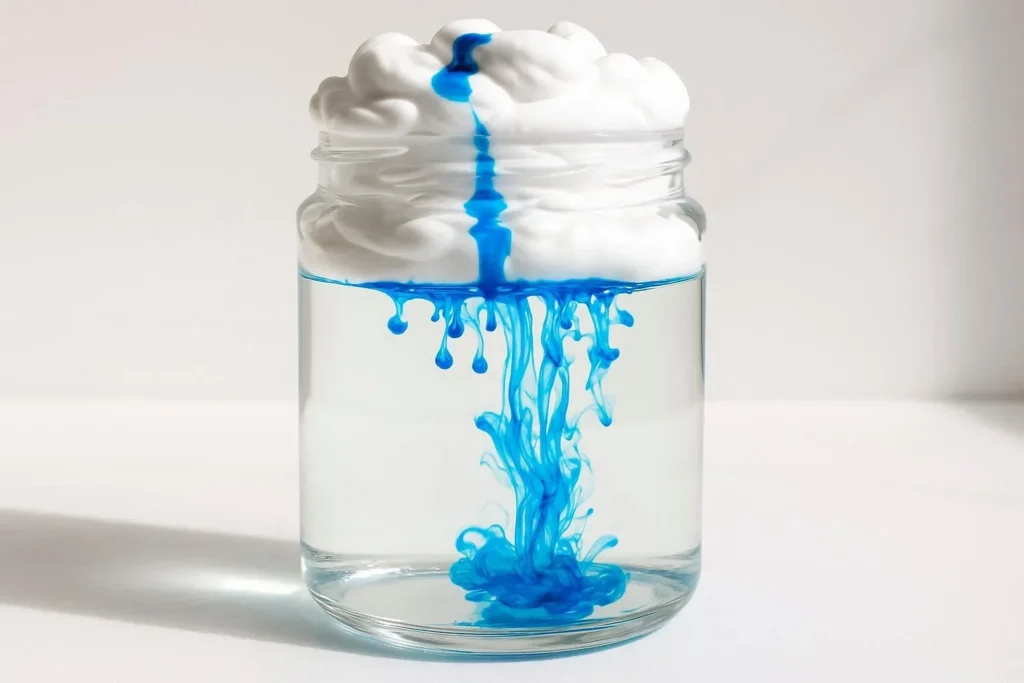
The generation of foam by yeast is rooted in the fundamental fermentation process. As yeast consumes sugars, it produces carbon dioxide (CO₂) and ethanol. CO₂ is a gas that readily dissolves in liquid under pressure, and when the pressure is released—such as when pouring a beverage—it escapes rapidly, forming bubbles. These bubbles are stabilized by proteins and lipids from the liquid, creating foam that can persist for minutes to hours. The quality of foam is influenced by factors such as temperature, carbonation level, liquid composition, and the presence of surfactants. For more on the chemical nature of foam, you can explore the detailed overview on foam.
Choosing the Right Yeast Strain for Foam
Not all yeast strains produce equal amounts of carbonation. Brewer’s yeast, specifically Saccharomyces cerevisiae, is favored for its robust CO₂ production and reliability. However, wild yeast, such as those present on fruit skins or in the environment, can yield unique flavor profiles and variable carbonation. The strain’s fermentative vigor, byproduct profile, and tolerance to alcohol or temperature all impact foam generation. For hobbyists seeking consistency, a commercial ale or lager yeast will offer predictable results.
Preparing Your Fermentation Setup
Creating foam with yeast begins at the moment you introduce the yeast to a sugar solution. Here’s a practical, step‑by‑step protocol that balances safety, simplicity, and scientific rigor:
- Sterilize all equipment. Use boiled or chemical sanitizers for water, glass carboys, airlocks, and stirring utensils. Contaminants can outcompete yeast and jeopardize foam quality.
- Prepare a priming solution. Dissolve 5–10 g of high‑purity sugar (e.g., dextrose) in 1 L of boiling water, then cool to room temperature. This provides an optimal sugar substrate for yeast metabolism.
- Inoculate. Add 1–2 g of dried yeast to the priming solution, gently stirring to ensure even distribution. Warm the mixture to 20–25 °C (68–77 °F) to activate yeast without causing heat shock.
- Seal and aerate. Cover the container with an air‑tight lid and allow the mixture to sit for 30 minutes to 1 hour, producing a rich CO₂ environment. This encourages yeast to grow densely and facilitates consistent foam.
- Determine the final volume and carbonation. Transfer the solution to a fermentation vessel (carboy or swing‑top bottle), leaving headspace for expansion. Attach an airlock to vent excess CO₂ while preventing contamination.
- Maintain temperature. Keep the vessel in a dark, temperature‑stable area (18–22 °C/65–72 °F). Sudden temperature shifts can halt fermentation or alter foam dynamics.
- Monitor fermentation. Use a hydrometer to track gravity changes. When the specific gravity stabilizes (typically after 3–5 days for standard strains), carbonation has reached equilibrium, and foam production will peak when the liquid is disturbed.
- Test the foam. Pour a small sample into a clean glass and observe the head. If the foam persists for a minute or more, the setup is successful. If the foam dissipates quickly, consider adjusting yeast quantity, sugar concentration, or temperature.
Troubleshooting Common Foam Issues
Even with meticulous preparation, foam quality can vary due to environmental or procedural nuances. Below are common problems and remediation strategies:
- Insufficient foam. Possible causes include low yeast viability, sub‑optimal sugar concentration, or excessive agitation during transfer. Refresh the yeast culture or increase sugar loading by 20 % and gently handle the liquid.
- Foam that collapses instantly. This is often due to a lack of surfactants. Incorporate a small amount of natural foam stabilizer, such as protein‑rich malt extract or a pinch of milk solids, which can increase bubble resilience.
- Clogged or ineffective airlock. A jammed airlock can allow oxygen in, leading to off‑flavors and foam instability. Clean the airlock regularly, and replace it with a new one if a blockage persists.
- Unpleasant aromas or off‑flavors. Verify that all equipment was properly sanitized. Contaminants like bacteria or wild molds can alter CO₂ composition and foam characteristics. If the beer or liquid smells sour or yeasty, consider re‑fermenting with a fresh starter.
- Temperature fluctuations. Sudden cold snaps can pause yeast metabolism, reducing CO₂ output. If your brewing area is prone to temperature swings, use a heat‑stable brew jacket or an insulated closet.
For those interested in deeper scientific insights, the USDA Agricultural Research Service offers comprehensive resources on yeast genetics and brewing science: USDA ARS. Similarly, health and safety guidelines for fermentation are maintained by the Food and Drug Administration.
Conclusion and Call to Action
Foam with yeast is more than a casual novelty—it’s a tangible demonstration of microbial metabolism, gas chemistry, and culinary creativity. By mastering yeast selection, meticulous sanitation, precise temperature control, and thoughtful carbonation, you can reliably produce impressive foam columns that enhance your brewing or scientific projects. Whether you’re bottling a batch of kombucha, experimenting with fermented drinks, or simply amazed by the frothy spectacle, the science remains the same: yeast consumes sugar, releases carbon dioxide, and creates beautiful, transient foam.
Ready to experiment? Start today—gather your materials, follow the steps above, and observe the magic of foam with yeast. Share your results on community forums or with friends, and continue refining your technique. Happy brewing and frothing!
Frequently Asked Questions
Q1. How quickly does foam appear after fermentation begins?
Once yeast starts metabolizing sugars, CO₂ production ramps up within a few hours. Typical beginners observe visible bubbles in a slurry within 3–5 hours, and a tangible foam surface within 24 hours.
Q2. Which yeast strain gives the most stable foam?
Brewer’s yeast, especially Saccharomyces cerevisiae (ale or lager strains), consistently produces high CO₂ output. Their robust fermentative vigor supports sustained bubble formation.
Q3. Can I use baking yeast for foaming experiments?
Baking yeast (Saccharomyces cerevisiae) can work, but its CO₂ production is lower and flavor profile different. For consistent foam, commercial brewing yeast is preferable.
Q4. Why does foam collapse quickly in some batches?
Rapid collapse usually signals insufficient surfactants or protein content. Adding malt extract or a mild milk protein boost can reinforce bubble walls. Also, aggressive agitation can break bubbles apart.
Q5. Are there safety concerns with small‑scale fermentations?
The main risks are over‑pressurization and contamination. Use airlocks, maintain proper sanitation, and control temperature. Small vessels limit catastrophic pressure buildup, but double‑check seals.
Related Articles

100+ Science Experiments for Kids
Activities to Learn Physics, Chemistry and Biology at Home
Buy now on Amazon
Advanced AI for Kids
Learn Artificial Intelligence, Machine Learning, Robotics, and Future Technology in a Simple Way...Explore Science with Fun Activities.
Buy Now on Amazon
Easy Math for Kids
Fun and Simple Ways to Learn Numbers, Addition, Subtraction, Multiplication and Division for Ages 6-10 years.
Buy Now on Amazon🚀 Try These Free Android Apps
Download these useful apps directly from the Google Play Store.


